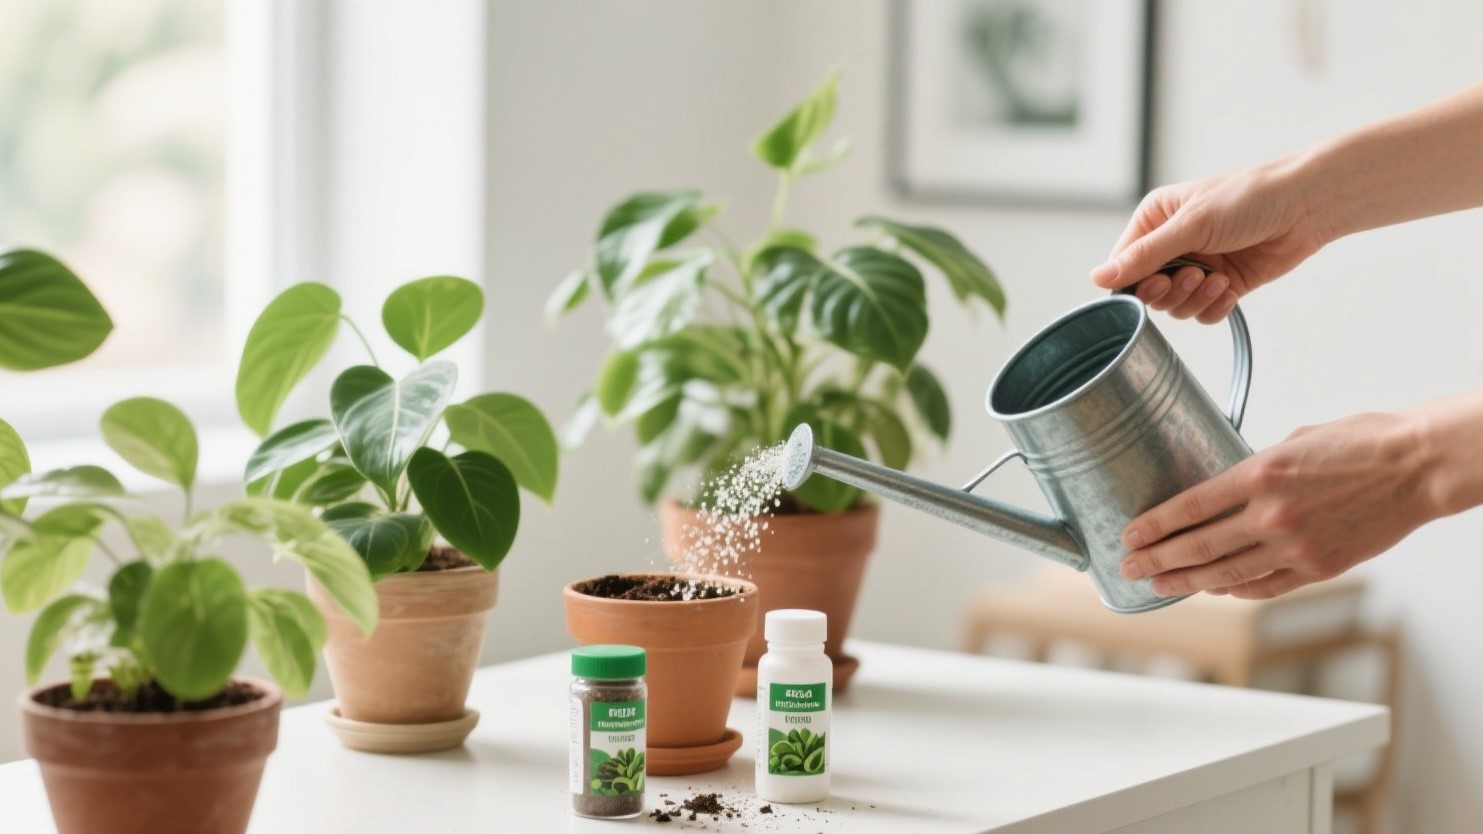
Introduction: Spring beds that look good and survive beaks 💐
Your seedlings can stay safe from pecking without turning the garden into a construction zone. The trick is choosing fine, low-glare materials and tidy forms that read as part of the landscape. Think mesh that disappears on camera, soft hoops, and petite cloches that let blossoms, not barriers, take center stage. 🌿
Bird pressure peaks when tender leaves first emerge and natural food is scarce. Light, breathable covers stop beaks and scratch damage while keeping airflow and light consistent. You’ll also learn quick-swap methods to lift covers for daytime pollinator access, then reset protection at dusk. 🐦
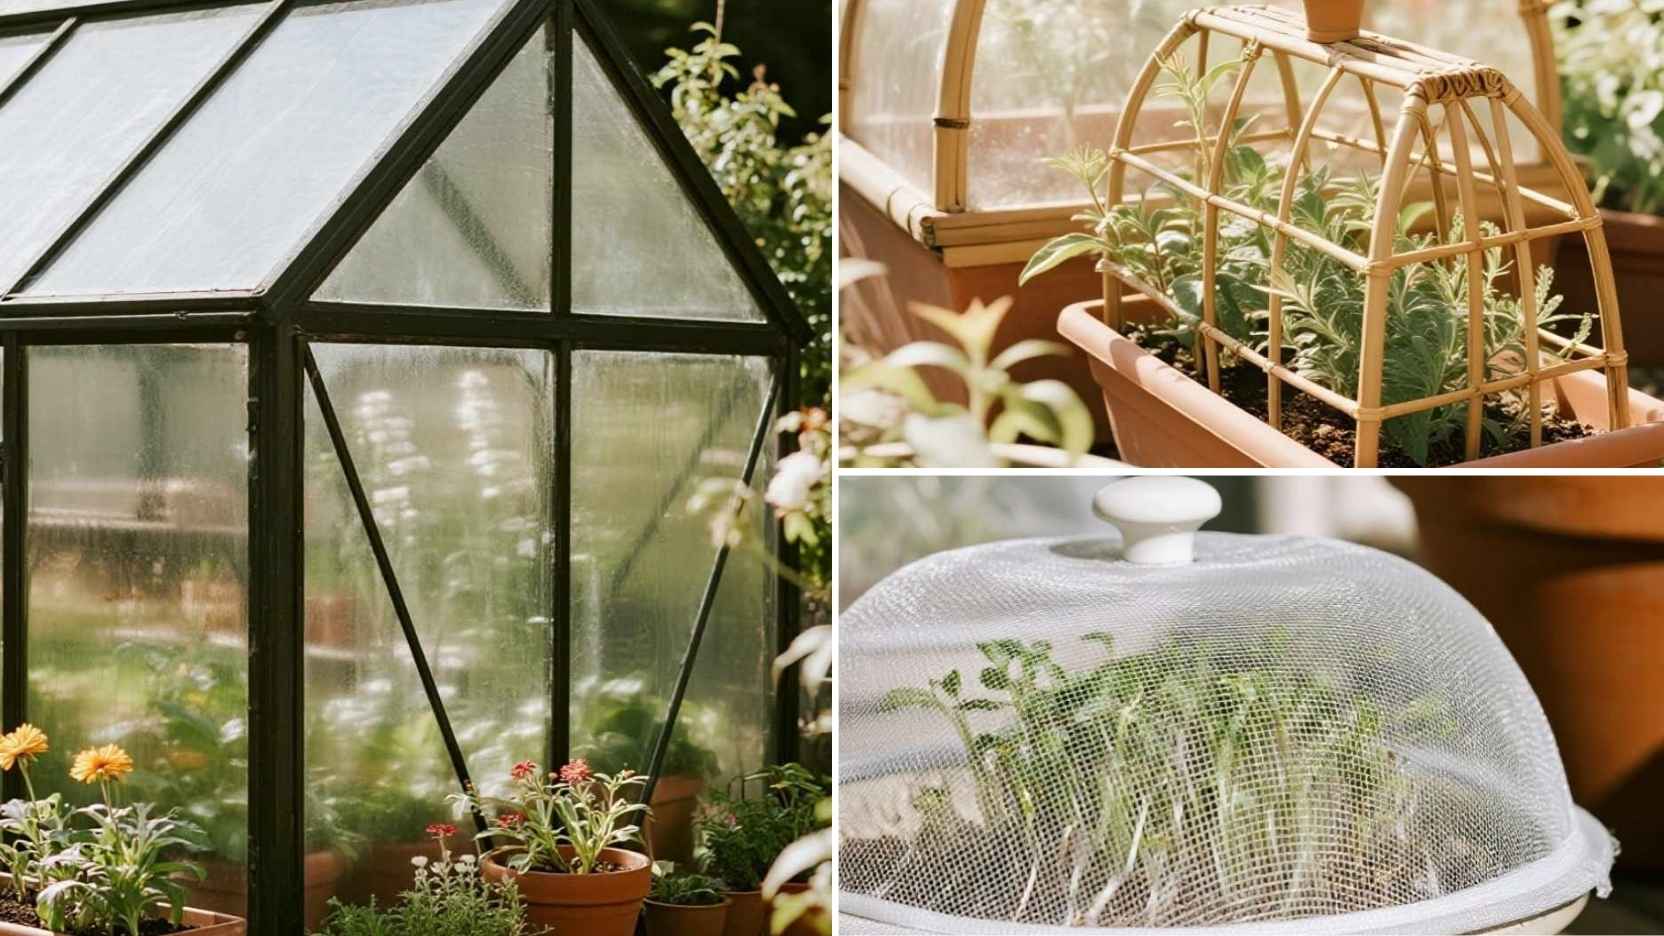
Choose the Right Mesh: Invisible on camera, effective in real life 🧵
For bird protection with minimal visual footprint, pick fine, UV-stabilized mesh in white or soft gray; it blends with sky and bokeh so it “disappears” in photos. Aperture around 5–10 mm stops beaks and scratching while preserving airflow and light penetration. For insect exclusion on specific beds, swap to 0.6–1 mm insect mesh, knowing it looks slightly more visible but still neat. 📸
Low-gloss fabric beats shiny plastic; it reflects less and reads cleaner in pictures. Choose edges with finished selvedges or hem with polyester thread to resist fray and keep lines crisp. If your climate runs hot, prioritize meshes with 85–95% light transmission to prevent legginess and heat stress. 🌞

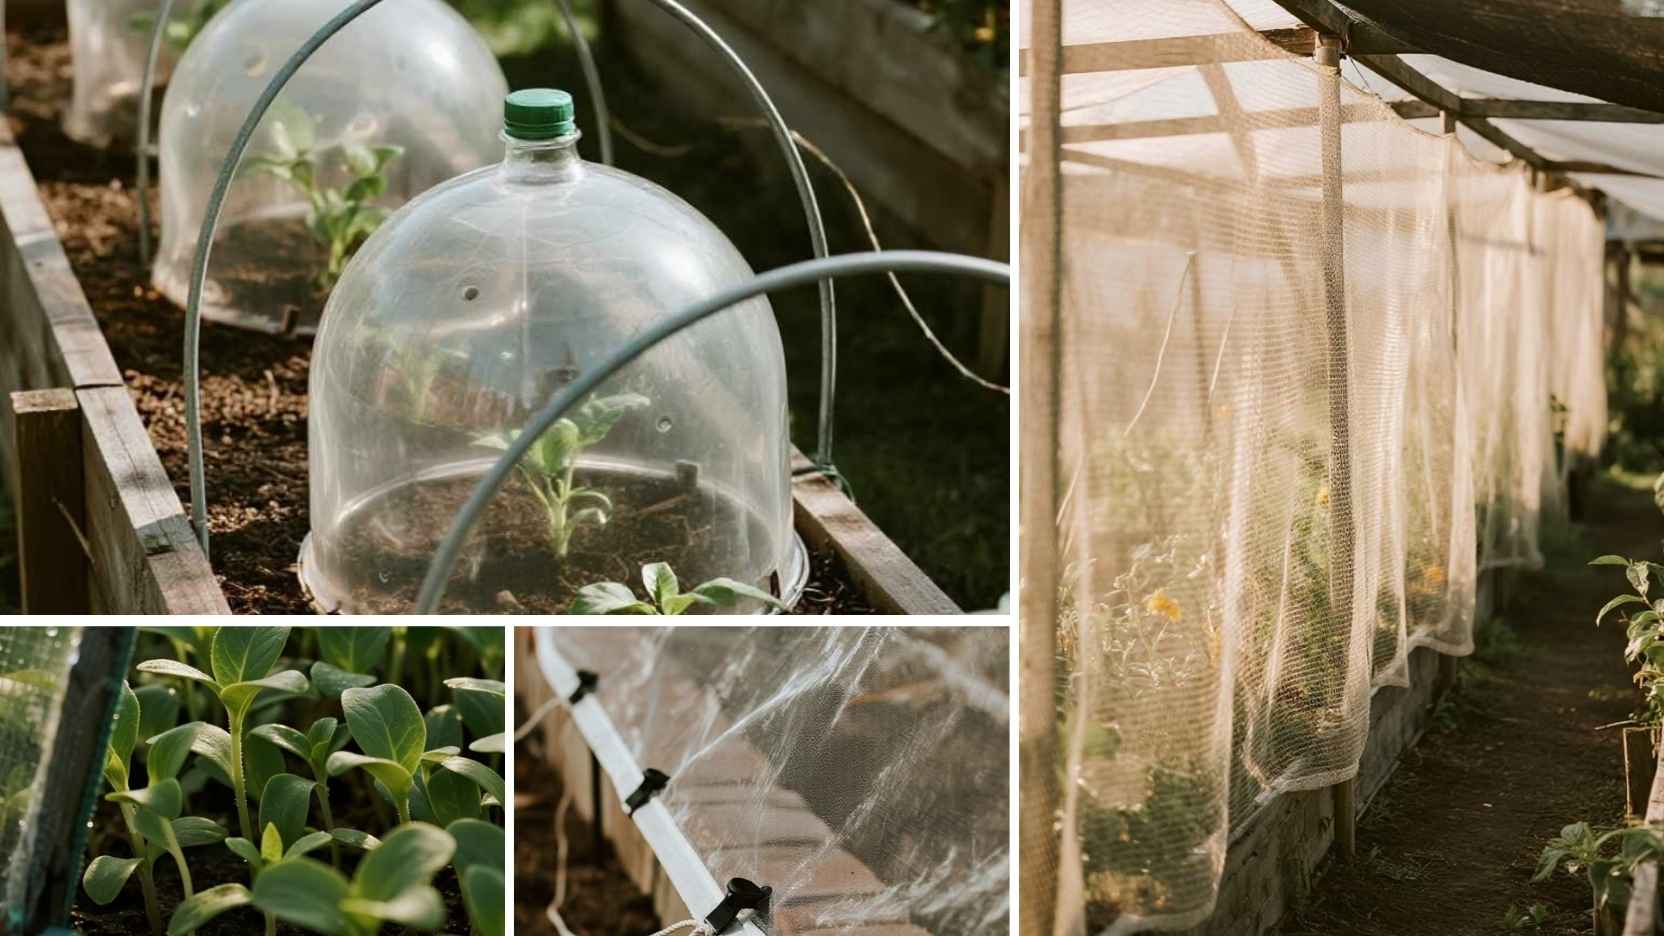
Low-Profile Structures: Hoops, bottle cloches, and micro-frames 🎯
Galvanized wire hoops (6–8 mm) or fiberglass rods create slim silhouettes that keep the cover off foliage. Space hoops 45–60 cm apart so mesh drapes smoothly without sagging into tender tips. For singles and small clusters, cut clear bottles as cloches—vent the top—so protection reads as “glasshouse chic,” not bunker. 🪴
Micro-frames made from 19 mm PVC or slim cedar battens hold a crisp rectangle that photographs cleanly. Paint frames a soft gray or off-white to match mesh and vanish into the background. Keep heights just above mature leaf canopy to minimize sail effect and visual bulk. 🖼️

Tie-Down Methods: Secure, tidy, and camera-friendly 🧷
Ditch bulky bricks along the edge; use landscape staples every 30–45 cm to anchor hems flush to soil. Add lightweight hem cord or elastic shock-cord at the base for neat tension that resists wind lift. Spring clips or butterfly clamps at each hoop crest keep lines smooth without puckers. 🌬️
If you garden on hardscape or raised beds, employ slim sand tubes or fabric “snakes” that contour without visual clutter. Color-match clips and cords to mesh so they fade from view. Keep excess mesh trimmed to a 5–8 cm skirt so edges don’t flap on camera—or seedlings. ✂️

Quick-Swap Access: Let pollinators in by day, re-secure at dusk 🐝
During bloom, open beds mid-morning when temperatures rise and bee traffic peaks, then re-cover before evening bird feeding. Use magnetic tabs, Velcro strips, or toggled cord at the long edge for a one-handed flip-open. Mark the “hinge” side with a discrete tag so you always lift the same edge and keep lines straight. ⏱️
For hoop tunnels, leave one end permanently clipped and roll the opposite end like a yoga mat, securing with two elastic ties. On micro-frames, add tiny cabinet hinges and a simple hook-and-eye latch for a picture-clean lid that lifts in seconds. The faster you can open and close, the more likely you’ll keep the routine—and your photos—polished. 📷
Light, Air, and Moisture: Prevent heat spikes and condensation 🌬️
Aim for covers that breathe: look for specs that indicate high airflow and minimal shade factor so seedlings don’t stretch. In warm spells, crack the leeward edge by 2–3 cm to vent without inviting birds. Morning venting helps evaporate dew and reduces fungal risk on dense plantings. 💧
If a cold snap threatens, layer a lightweight row cover beneath bird mesh for a temporary thermal boost. Remove the inner layer first when temperatures rebound to keep growth compact. Keep an eye on leaf contact points—add a spare mini-hoop if mesh kisses tender tips. ❄️

A Photography-First Setup: Clean lines, cohesive palette, easy edits 🎨
Choose meshes and frames in the same neutral family so the eye lands on petals, not hardware. Keep rows straight, hem lines parallel to bed edges, and clips all oriented the same direction. A fast pre-shoot tidy—pluck yellow leaves, smooth hems—saves time in editing later. ✨
Background matters: align tunnels so the horizon is simple and the mesh reads as a gentle arc. Shoot during golden hour to reduce reflections and soften any remaining texture. If you need to widen your frame, slightly lower hoop height for sleeker proportions without compromising plant clearance. 🌇

Care, Storage, and Reuse: Make it last, keep it lovely ♻️
Rinse mesh in a tub with mild soap at season’s end, then air-dry flat to protect fibers. Roll (don’t fold) to avoid crease memory that shows up in photos the next spring. Store rods and frames bundled by bed length so setup stays quick and tidy. 🧼
UV-stabilized HDPE meshes often outlast basic plastics across multiple seasons, keeping costs and waste down. Replace only abraded edge cords or clips, not full panels. Label each roll with bed name and length so the first sunny day becomes plant day, not puzzle day. 🏷️
Quick Shopping & Setup Cheatsheet (for clean visuals) 🧰
Pick: fine, low-gloss mesh (5–10 mm for birds; 0.6–1 mm for insect-specific beds) and slim hoops. Anchor with landscape staples + hem cord; keep a consistent 5–8 cm skirt. Add quick-release hardware (magnet/Velcro/toggle) on one long edge for fast pollinator access. 📏
Space hoops 45–60 cm; match frame and mesh colors; avoid bulky weights along edges. Vent leeward side on hot days; double-layer only for frost, then remove promptly. Finish with a pre-photo tidy: align clips, smooth hems, and brush soil crumbs from the skirt. 🧹
Conclusion: Safe seedlings, beautiful spring 📷🌱
With fine mesh, slim structures, and thoughtful tie-downs, your beds stay photogenic while birds stay politely outside. Quick-swap edges let pollinators work by day and protection return by night. The result is a garden that grows strong and looks like a magazine spread—even up close. 🌼