Introduction: Why a “Leaf Quilt” Works 🍂🧶
Fallen leaves aren’t trash—they’re a free, slow-release soil conditioner and a natural blanket. When you top beds with compost and tuck them under shredded leaves, you lock in warmth and moisture. The result is cozy soil, thriving microbes, and raised beds that look rich and well-kept all winter. 😊
Bare soil loses heat and life the way an uncovered mug loses steam. A deep, airy leaf layer traps pockets of insulation while compost below feeds the underground food web. Come spring, the quilt melts into humus, giving you a jumpstart before planting. 🌱✨
The Science: Insulation, Microbes, and Moisture Management 🔬🌡️
Leaves create still air pockets that reduce heat loss, like the loft in a down jacket. Shredding increases surface area, speeding breakdown and preventing matting that can shed water. Compost beneath adds microbes and nutrients that transform carbon-rich leaves into dark, crumbly soil. 🍁
Moist bedding wakes fungi and bacteria that knit leaves together into a breathable crust. That gentle crust buffers temperature swings and protects soil aggregates from pounding rain. Earthworms will commute upward on mild days to dine, dragging bits down like tiny plows. 🪱

Materials & Ratios: What to Gather Before You Start 🧰📏
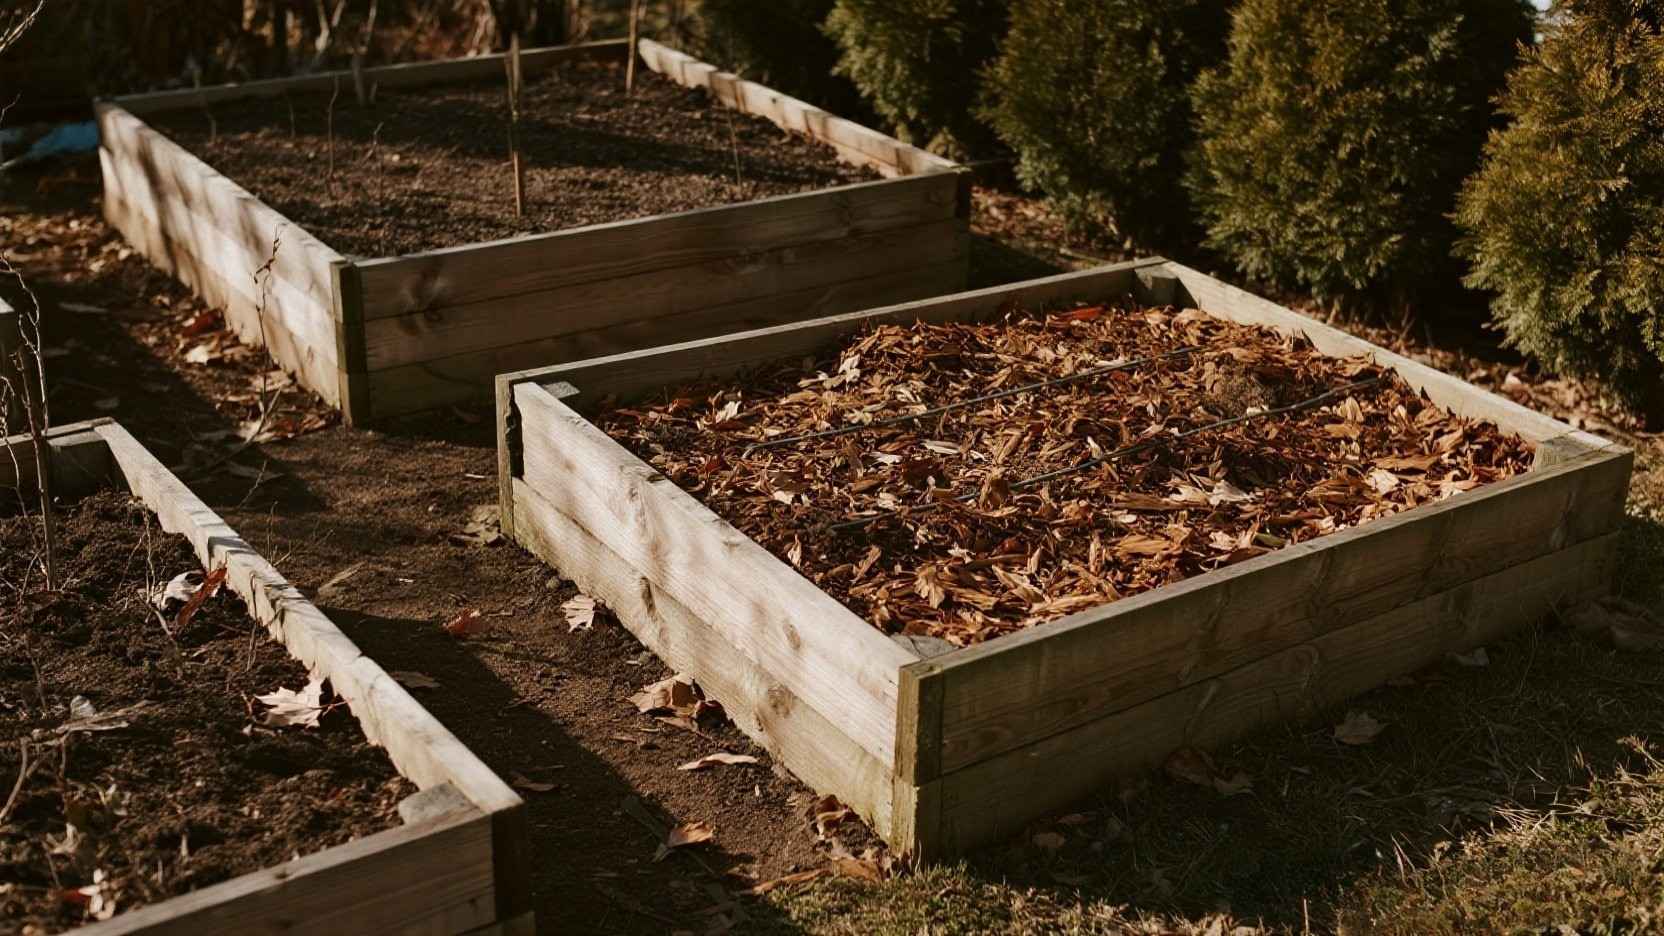
Aim for a simple stack: 1–2 inches of finished compost, then 3–6 inches of shredded leaves, topped with a fine “crumb coat.” Oak, maple, and fruit-tree leaves are excellent; skip thick mats of unshredded magnolia or whole sycamore. If you garden under walnuts, hot-compost those leaves first to neutralize juglone risk. 🥣
If your soil is nitrogen-hungry, sprinkle a light dusting of nitrogen source (e.g., alfalfa meal) before the leaf layer. Slight moisture helps everything settle without compacting; think wrung-out sponge, not soggy towel. Keep mulch 2–3 inches away from woody stems to prevent rot. 💧
Step-by-Step: The Raised-Bed “Leaf Quilt” Method 🪜🍁
1) Top Off with Compost. Rake the bed smooth and add 1–2 inches of finished compost. This feeds microbes, buffers nitrogen, and creates a level base that looks instantly refreshed. 🌿
2) Leave Roots, Trim Tops. Snip annuals at soil level and let clean roots decompose in place to build pore channels. Remove diseased foliage and seed-laden weeds, but keep healthy stems as extra carbon. ✂️
3) Add Deep Shredded Leaves. Apply 3–6 inches fluffy, not compressed; shred with mower or chipper. Lightly water to settle, then fluff by hand where needed so air still moves. 🚿
4) Crumb Coat Finish. Top with 0.5–1 inch of fine mulch or sifted compost for a polished, “cocoa” look and better water infiltration. Edge the bed for crisp lines and wind resistance. 🍫
Aesthetics: The “Cocoa Mulch” Look That Sells the Season 🎨🤎
A fine top dressing reads like a finished living room rug—it pulls the whole design together. The dark crumb coat frames amber leaves and makes evergreen structure pop. In low winter light, the palette glows like hot chocolate beside a campfire. 🔥
For paths, use a slightly different texture or color so beds don’t visually bleed into walkways. A gentle rake pattern adds craft without fuss and helps shed puddles after rain. Simple edging—brick, steel, or cedar—turns practical mulch into a garden feature. 🧱

Do’s, Don’ts, and Smart FAQs ✅❌
- Do shred leaves, remove diseased foliage, and keep mulch off crowns. Do water lightly after mulching and re-fluff if crusting appears. Do spot-add nitrogen if early spring plants look pale. ✔️
- Don’t leave soil bare, pile mulch against stems, or trap vole tunnels with solid leaf mats. Don’t use street-swept bags with unknown contaminants. Don’t panic if the layer settles—settling means biology is working. 🙅♀️
- Quick FAQs: Worried about nitrogen tie-up? Your compost “primer” prevents most issues. Concerned about slugs? Maintain airy texture and avoid soggy conditions; add rough grit ring where needed. 🧩
Troubleshooting: Wind, Pests, and Wet Winters 🌀🐭
Windy site? Net the bed loosely with jute mesh, tuck edges, or lay airy twig lattices as wind baffles. Over time, the quilt knits together and resists gusts better than loose straw. 🌬️
Rodents tunneling? Keep mulch airy, avoid food scraps, and trim nearby grass to reduce cover. Consider snap-style, tunnel-protected traps outside the bed if pressure builds. 🐭
Heavy rain? Use the crumb coat for drainage, and poke a few vertical “chimneys” with a dibber to improve airflow. Re-fluff after storms to restore loft. 🌧️

Seasonal Timeline: From Leaf Fall to Spring Wake-Up 🗓️🌤️
- Late Autumn: Clear spent crops, leave healthy roots, add compost primer, and pile on the leaf layer. Finish with crumb coat, edge the bed, and water lightly to settle. Take a photo—this becomes your spring “before” shot. 📸
- Mid-Winter: Quick inspection after storms; re-fluff or top up thin areas with more shredded leaves. Enjoy the warm tones and the tidy, cocoa finish that reads intentional. Minimal disturbance keeps microbes humming. 🎯
- Early Spring: Pull mulch back from seed rows or let it rest between wide transplants. Any remaining leaf bits become path mulch or get scratched in lightly. You’ll notice faster soil warming and crumbly tilth underfoot. 🌷
Conclusion: A Warmer Bed, A Richer Spring 🌱🤎
Think of your raised bed as a loaf in the oven: the crust holds heat while the center transforms. Compost plus shredded leaves gives you that protective crust and a soft, living interior. By spring, you’re not just starting clean—you’re starting ahead. ⏩
The “leaf quilt” turns yard waste into design, biology, and performance in one move. You’ll save money on bagged mulch, protect your soil, and enjoy a garden that looks curated even in dormancy. That’s the quiet luxury of caramel leaves and a cocoa finish. ✨